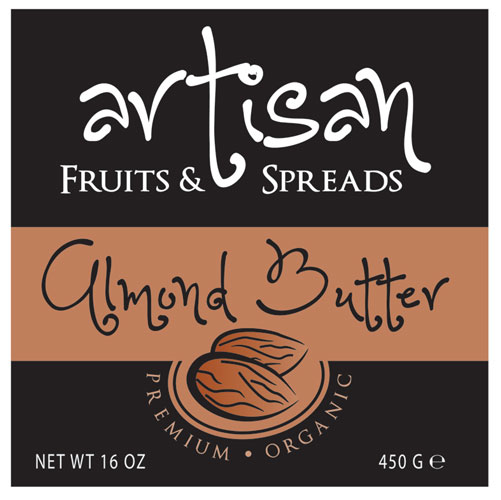
Label Tutorial: How to Create the "Almond Butter" Jar Labels
Remember to follow steps 1 - 3 on the
main tutorial page
to initially set up your label document. Then, go through the steps below to create the "Almond Butter" label!
Step 1: Change the Background Color for the Square Label
Step 2: Draw the Basic Background Shapes
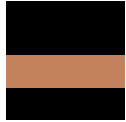
A. Create the brown rectangle.
1. Select the Rectangle tool again and draw from one edge of the square to the other. If you have Smart Guides turned on (Ctrl + U), these points should "snap" together so the rectangle and square edges are lined up. For this example, the rectangle is 2.5" x 0.75."
2. Change the color of the rectangle to C=15, M=50, Y=65, K=10.
B. Draw & style the brown oval.
1. Using the Ellipse tool, make a small oval. The one used for this example is about 0.75" x 0.5."
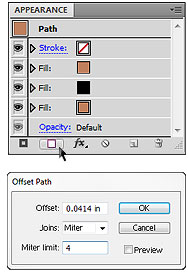
2. In the Appearance palette, click on the "Add New Fill" icon as shown to add three fills. The top fill color is the same as the rectangle drawn in step 2A: C=15, M=50, Y=65, K=10. The middle fill is black (if you used a rich black, make sure this fill is the same color as step 1) and the bottom fill color is the same as the top.
3. Select the middle black fill and click on the Effects icon at the bottom of the Appearance palette. Choose Path > Offset Path to enter an offset value. For this example, enter 0.0166 in and click OK.
4. Select the bottom brown fill and give it an offset value of 0.0414 in.
5. Rotate the circle slightly by clicking Object > Transform > Rotate from the top menu and entering an angle of 7 ° . Click OK.
6.
With the Selection tool, move the circle so it is centered on the label and about 2/3 below the brown rectangle. In the Layers palette, move the path so it is above the background but behind the brown rectangle.
Step 3: Draw the Almonds
There are several ways to go about creating an almond shape. If you are familar with the Pen
tool, this is likely the easiest and most straightforward method.
A. The almond shape
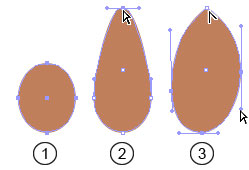
1. Begin by making an oval with the Ellipse tool.
2. Choose the Direct Selection tool and click on the top anchor point of the oval. Move it up about twice the height of the original oval.
3. Use the Pen and Direct Selection tools to change the angles and lengths of the handles on each anchor point.
The Convert Point tool (hold down the Alt key with the Pen tool selected) allows you to make a corner point or extend the handles in different directions.
4. Experiment with the angles and positioning of the anchor points until you achieve the desired results.
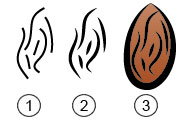
B. Add the gradient effect & outline
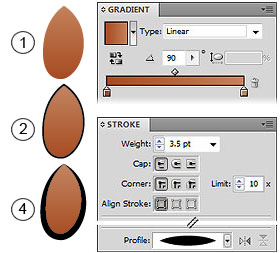
1. With the almond shape selected, open the Gradient palette. Double click the color stops to change the left-hand color to C=25, M=80, Y=100, K=17 and the other to C=15, M=50, Y=65, K=10. Make sure the Type is set to "Linear" and change the angle to 90 ° .
2. Select the Stroke in the Appearance palette. Make it black.
3. Open the Stroke palette and click on the drop down icon at the top right. Select "Show Options."
4. Change the weight to 3.5 pt. Click the drop down menu next to Profile and select the second option, which looks like a flattened oval. This will make the line taper to a point at the top.
C. Add the texture lines
1. Using the Paintbrush tool, draw several irregular lines, which will serve as the texture for the almond.
2. Select all of these lines using the Selection tool. In the Stroke palette, change the Weight to 1.5 pt and select the flattened oval from the Profile menu as you did in Step B4.
3. With the lines still selected, use your mouse or arrow keys to move the lines on top of the almond shape.
D. Rotate & Copy the Shapes
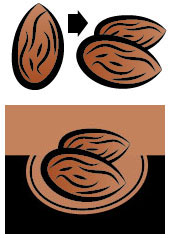
1. There are three ways in which you can rotate the almond onto its side. First, use the Selection tool to select all of the paths you want rotated.
- Option 1: Make sure the bounding box option is turned on (View > Show Bounding Box or Shift+Ctrl+B). Hover the mouse just outside one corner of the bounding box until the curved double arrow appears. Click and drag to rotate the almond.
- Option 2: Turn the shape to a specific angle by choosing Object > Transform > Rotate from the top menu
- Option 3: Use the Rotate tool.
2. Copy (Ctrl+C) the entire almond and paste it in front of the first one (Ctrl+F).
3. Reposition, resize and rotate the second almond slightly so the two overlap.
4. Position the almonds inside the oval drawn in Step 2.
Step 4: Style the Text
A. Type on a path.
1. Click on the oval created in Step 2B with the Selection tool. Copy and paste it in place, above the original (Ctrl+C and then Ctrl+F).
2. Choose the Type tool. Hover the cursor over the oval path while holding down the Alt key. The bottom of the cursor should have a wavy line. Click on the path.
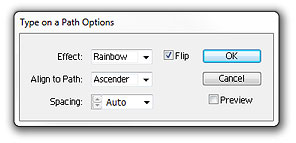
3. Type the "premium organic" text and choose Type > Type on a Path > Type on a Path Options... from the main menu. For Effect, choose Rainbow; Ascender for Align to Path; and check the Flip box.
4.
To situate the text, click on the handle extending from the center of the text with the Selection tool. Drag the handle until the text is around the bottom of the oval.
5. The font used here is 9 pt Optimus Princeps. In the Character palette, set the Tracking to 80 and the Baseline Shift to -4 pt, which will move the text away from the oval.
6. Change the font color to C=11, M=38, Y=48, K=8.
5. The font used here is 9 pt Optimus Princeps. In the Character palette, set the Tracking to 80 and the Baseline Shift to -4 pt, which will move the text away from the oval.
6. Change the font color to C=11, M=38, Y=48, K=8.
B. Other text.
"artisan" - "One Starry Night" font, 103 pt size in white, center aligned.
"fruits & spreads" - Optimus Princeps font, 14 pt size in white, center aligned. Add more space between the ampersand and "spreads" so the text fits nicely around the "T" in the text above.
"almond butter" - "One Starry Night" font, 47 pt size in black, center aligned. Tracking is set to 40 to create more space between the letters.
"net wt..." - Myriad font, 6 pt size in white, center aligned.
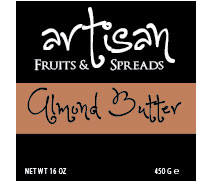
Use the Selection tool to move the other label components to arrange them however you would like. Now your label is done! Print it out on adhesive label paper, cut them out and apply to your containers. Voila!
For a shortcut, click on the finished label image to view and print a PDF .
To see how this label looks on a filled container, click on the image in the box to the right. Be sure to browse through our Food Containers Index for other great food label ideas!
For a shortcut, click on the finished label image to view and print a PDF .
To see how this label looks on a filled container, click on the image in the box to the right. Be sure to browse through our Food Containers Index for other great food label ideas!
Why Businesses Choose SKS Bottle & Packaging
SKS Bottle & Packaging makes it easy to order bottles, jars, and packaging supplies online. From fast shipping to flexible savings programs, our goal is to help businesses of all sizes source reliable packaging with a smooth and efficient ordering experience.
Chat with Us



 Shop All Packaging
 Glass Containers
 Plastic Containers
 Metal Containers
 Cardboard Containers
 Industrial Containers
 Caps / Closures
 Shrink Bands
 Design Custom Labels
 Subscribe & Save Orders
 Shop By Industry
 Custom Packaging
 Pallet Qty Packaging
 SKS Direct Wholesale
 Packaging Equipment
 Help/Info
 New Products
 Promotions
 Newsletters
 Combo Kit Deals
 Product Closeouts
 Recently Back In Stock
